
The Latest In Saw Blade Technology
Fully patented and proven successful in cutting and sanding your work piece all at one time. Use with table saw and power miter boxes for the perfect joint or finished edge. No edge sanding is required after passing your work piece through the table saw and when making miters the joints virtually disappear. Make minor length adjustments by simply sliding the work piece towards the rotating blade (just like a disc sander). One operation produces two functions. Try it and see for your self how easy it is to make the ultimate cut with Final Cut blades.
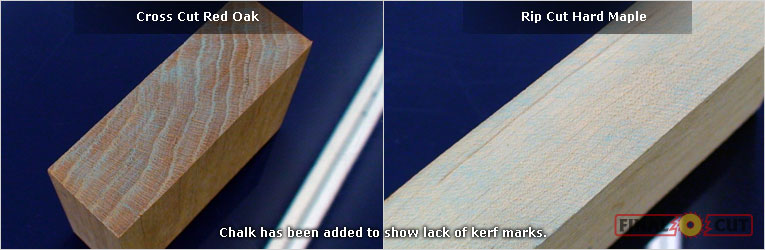
Everyone in this industry has been taught that the more teeth a blade has the better the cut is, Final Cut discs do not rely on the teeth to finish the cut so the number of teeth can be greatly reduced. The abrasive disc is actually wider than the blade kerf therefore the stock is cut by the blade and sanded by the disc.
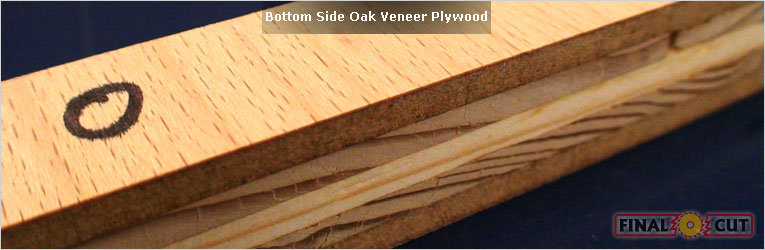
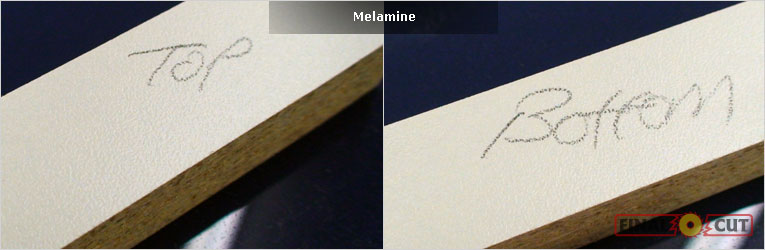
Final Cut Saw Blades Cut Smooth, Top and Bottom
Product Features
- Step-saving blade “no sanding required”
- Kick-back is greatly reduced
- Eliminates binding of saw blade
- The blade does not heat up
- Precision cutting of joints—every time
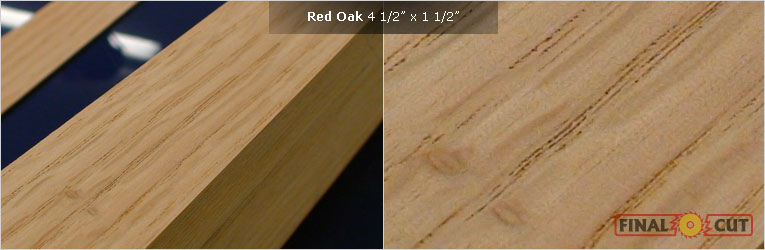
- Designed for cross cuts and rips on soft and hard materials
- Completes two jobs at one time—Removes the kerf marks and creates the ultimate finished cut producing a smooth sanded finish at the initial pass
- Can be used on Miter Saw, Table Saw, and Radial Arm Saw
- Abrasive discs are used on both sides of blade for double sided sanded finish
- Disc can be trimmed to fit any size blade using standard scissors
- Replace disc when the perimeter appears burnt, the sanded finish is not smooth or disc becomes loose
The Final Cut Discs are not designed to work with all blades; however, if you have a blade that meets the following specifications you will most likely see good results! The specifications are: Plate Thickness of 0.070 and Kerf Thickness of 0.104.
Easy Installation Instructions For Replacement Disc
- Clean blade with lacquer thinner
- Wash blade with soapy water and dry blade
- Insert Universal Centering Tool in Blade
- Remove protective backing from abrasive disc and apply mist coat of 3M Super 77 adhesive to disc. Place disc on blade and using the protective backing from disc cover top of disc and apply pressure to adhere disc to blade.
- To remove wore disc apply lacquer thinner to disc and peel off
- For best results, make sure abrasive discs extend through stock being cut
Ideal For Wood Workers, Contractors, Carpenters & Cabinet Makers, and Home-Hobbyists


Try it out and see for yourself how Final Cut can be a valuable asset.